Table of Contents
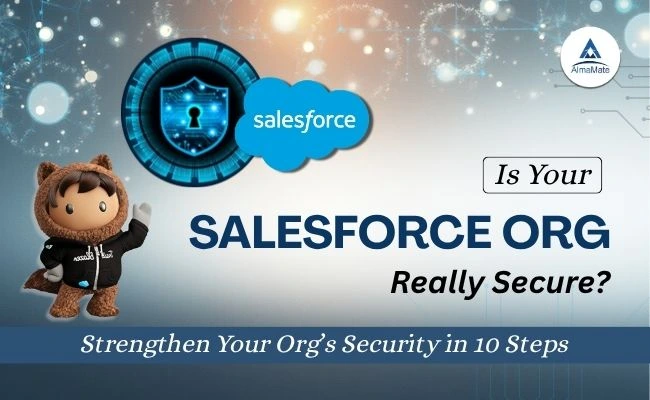
For countless businesses, Salesforce isn’t just a database; it’s the nervous system of their operations, housing everything from proprietary customer lists and intellectual property to sensitive financial projections. This centrality makes it an enormous target. Data security, then, isn’t an option—it’s the fundamental requirement of doing business. Yet, the vast majority of organizations operate with outdated Salesforce security configurations, relying on luck rather than foresight.
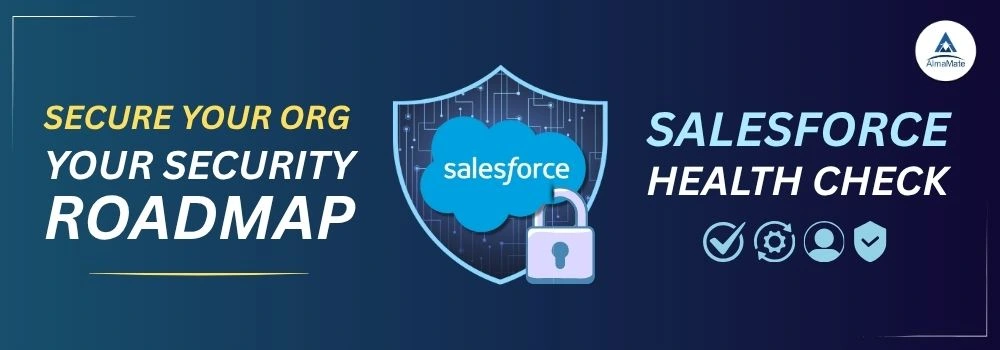
Enter the Salesforce Org Health Check—your personalized, in-house Salesforce security consultant. It’s a powerful, often underutilized tool that compares your current configuration against a set of industry-leading Salesforce security best practices established by Salesforce. Think of it as an X-ray for your org, revealing hidden vulnerabilities before they become catastrophic breaches.
This roadmap is your complete, humanized guide to moving from a state of vulnerability to one of robust, auditable Salesforce security. We’re breaking down the journey into 10 critical, actionable steps, ensuring you not only know where you stand but exactly how to build a fortress around your most valuable asset: your data.
Where Do You Stand Today?
The first rule of Salesforce security is simple: you can’t fix what you don’t measure. Your journey begins with running the Salesforce Org Health Check to establish your baseline. This is the moment you stop guessing and start knowing.
- How to find and run the Salesforce Org Health Check in Setup. The tool is deceptively easy to find. Go to your Salesforce organization, navigate to Setup, and simply type “Health Check” into the Quick Find box. When you run it, Salesforce instantly compares your organization’s settings—everything from password length to API access—against the Salesforce Security Baseline, which is a collection of recommended field-level, organization-level, and user access settings. You don’t need to be a Salesforce security expert; the tool translates complex requirements into simple comparisons.
- The Scorecard: How to genuinely interpret the 0-100% score and what those High-Risk flags really mean for your business. You’ll be given a score between 0% and 100%. Don’t obsess over a perfect 100% immediately. The score is a guideline, not a pass/fail grade. A score in the 80s or 90s is excellent. A score in the 60s or below suggests urgent attention is required. What truly matters is the breakdown: the settings are categorized as High-Risk, Medium-Risk, or Low-Risk. High-Risk flags are your priority. These represent configurations that directly violate fundamental Salesforce security tenets, often leaving your environment exposed to the most common and damaging attacks, such as compromised credentials or session hijacking. For example, a setting that allows users to reuse old passwords will be flagged as High-Risk because it makes password guessing trivial. These flags are non-negotiable and must be addressed first. They mean your data is currently exposed to a readily exploitable weakness.
Mastering Password Policy
Your users’ passwords are the main gate to your entire ecosystem. If they are weak, easy to guess, or never change, the gate might as well be wide open. This step is about replacing a flimsy lock with a bank vault door.
- Moving beyond basic settings: Why you must enforce a strong password length and expiry rule. Weak passwords—like those under 10 characters—can be cracked by modern computing power in minutes. Navigate to Setup > Security > Session Settings. Here, you need to enforce a strong minimum password length. Aim for 15 characters or more. Why? Because complexity dramatically increases the time and computational power required for a brute-force attack. Similarly, enforce an expiry rule. Passwords should expire, forcing a change, typically every 90 days.
- Non-Negotiable: Strategies for fully implementing Multi-Factor Authentication (MFA) across your organization. If there is one setting that defines present-day Salesforce security, it is Multi-Factor Authentication (MFA). Salesforce has made it mandatory because it works: MFA stops over 99.9% of account compromise attacks. Even if an attacker steals a user’s password, they cannot log in without the second factor (like a temporary code from the Salesforce Authenticator app or a Salesforce security key). Your strategy must be to implement this universally. Use the MFA Assistant in Setup to guide you. Start with a pilot group, communicate the why, and then use permission sets to enforce MFA for every standard and custom profile in your organization, especially for those with more privileges. Any user who can log in should require MFA.
Stop Session Hijacking: Control User Connections
A user session is the continuous link between the user and Salesforce after they log in. If that session token is hijacked, the attacker can operate as the legitimate user without needing their password or MFA. Controlling sessions is crucial for limiting this exposure.
- Balancing session expiration (Salesforce security) with user workflow (usability). In Session Settings, you define how long a user can remain logged in without activity. Setting the session expiration too long (e.g., 8 hours or “never expires”) is a high-risk security flaw. If a user steps away from their computer or loses their device, the attacker has a vast window to seize control. Conversely, a timeout that is too short (e.g., 30 minutes) creates user friction, leading to productivity loss and frustration. The optimal balance is usually a 120-minute (2-hour) timeout set to expire immediately upon being idle. This means if the user is actively working, they stay logged in, but the moment they leave their desk, the session is protected.
- Locking it down: How to use IP restrictions to ensure users only log in from safe locations. For high-value users, like your System Administrators and Salesforce security staff, you must add an extra layer of geographic control. IP Restrictions (found on the Profile page) allow you to specify a range of approved network addresses. If a user attempts to log in from any IP address outside of this approved list—even with the correct username, password, and MFA code—they are denied access. This effectively limits the attack surface to only known, safe corporate networks or approved VPN endpoints, creating a nearly unbreachable Salesforce security perimeter for your most privileged accounts.
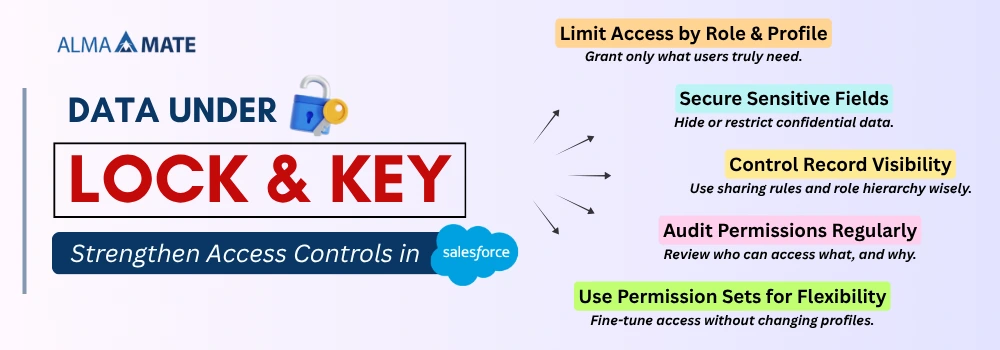
The Principle of Least Privilege
The Principle of Least Privilege (PoLP) is foundational to modern Salesforce security: a user should only have the minimum permissions necessary to perform their job, and nothing more. The biggest internal security risk often isn’t a malicious actor; it’s an over-privileged but well-meaning employee who accidentally deletes or exposes data they shouldn’t have seen in the first place.
- The critical audit: Finding and cutting back on users who have “Modify All Data” or “View All Data.” These two permissions are the digital equivalent of a “God Mode” cheat code. “Modify All Data” allows a user to edit or delete any record in the entire org, regardless of sharing settings or ownership. “View All Data” lets them see everything. These permissions must be audited immediately. Go to Setup > Users and run a report on profiles and permission sets. You should aim to reserve these two permissions for only a handful of senior System Administrators—ideally, less than 1% of your user base. For every other user, these privileges must be revoked to enforce proper segregation of duties.
- Cleaning up your profiles: Streamlining Permission Sets to grant only the access needed, not wanted. The old way of managing permissions was to grant a large, all-encompassing Profile (e.g., “Standard User”) and then try to take things away. The modern, secure approach is to use a highly restrictive, standard profile as the base, and then use small, surgical Permission Sets to add only the specific access required. Need a sales rep to run a custom report? Give them a “Custom Report Runner” Permission Set, not the Admin Profile. This granular approach ensures you grant only the access needed, not the overwhelming access wanted.
Vetting Your Integrations and Outsiders
Salesforce rarely operates in isolation. It connects to marketing platforms, ERP systems, reporting tools, and more. Each of these connections is an open bridge, and if not properly secured, that bridge can become a silent, permanent backdoor for attackers.
- Reviewing your Connected Apps (APIs) and third-party tools. Connected Apps are the way external services access your Salesforce data using APIs. Think of your email marketing automation tool or a mobile app connecting to customer data. Find the list in Setup by searching for “Connected Apps OAuth Usage.” Go through this list and ask: Do we still use this app? Who owns this integration? What is its scope of access? Many organizations find forgotten, outdated connected apps that still hold high-level API access to their entire org. Revoke access immediately for any app that is no longer in use. For active apps, verify that their assigned permissions (via profile or permission set) adhere to the Principle of Least Privilege (Step 4). An API connection should only have the data access absolutely required for its function.
- Securing the bridge: Tightly controlling Remote Site Settings—if you don’t need it, delete the whitelist. When your custom Salesforce code (like Apex) needs to send data out to a third-party endpoint (a web service, a proprietary external database), that external URL must be whitelisted in Remote Site Settings. This is a critical Salesforce security control. Search for it in Setup. Like Connected Apps, this list often accumulates clutter over time. A large, unnecessary list of whitelisted external domains increases your risk of a Server-Side Request Forgery (SSRF) attack, where malicious code could trick your org into communicating with an unauthorized destination. Review every entry. If you don’t recognize it or the service is deprecated, delete the whitelist entry. A clean, minimal list is a secure list.
Closing Data Leaks: Field and Record Access
The most complex and nuanced part of Salesforce security is the data. A user might have permission to see an Account record, but should they see the CEO’s private cell phone number on that record? The security model is designed to control access on two levels: the record (who can see the whole file) and the field (who can see specific pieces of information within the file).
- It starts with FLS: A quick check on your Field-Level Security to hide sensitive data from the wrong eyes. Field-Level Security (FLS) is your granular control mechanism. FLS determines whether a user can view or edit a specific field on an object. This is non-negotiable for sensitive data like credit scores, salary information, or health data. When you create a new sensitive field, you must manually ensure that its visibility is restricted on the relevant profiles and permission sets. The Salesforce Org Health Check will audit your FLS settings, often flagging fields that are exposed to users who shouldn’t see them. Make FLS checks a mandatory step in every change management process—if you expose a new sensitive field, you’ve created a data leak.
- Beyond FLS: Ensuring your organization-wide defaults (OWD) are as restrictive as possible. Your Organization-Wide Defaults (OWD) are the baseline sharing settings. They answer the question: If I own a record, what level of access does a user who is not my manager, on my team, or specifically granted access, have? The secure philosophy is always to start with the most restrictive setting and then open access only when necessary. For most sensitive custom objects, Accounts, Opportunities, and Leads, your OWD should be set to Private or Public Read Only. Setting an OWD to Public Read/Write on any sensitive object is a critical failure of the Salesforce security model, effectively granting everyone in the company broad access without justification. If your Salesforce Org Health Check flags OWD settings, the recommendation will almost always be to make them more restrictive.
Time to Act: Prioritizing Your Security Fixes
You’ve finished the Salesforce Org Health Check and now you’re staring at a huge list of vulnerabilities. Trying to fix everything at once is a surefire way to create a mess. Instead, you need a surgical, prioritized plan of attack.
- Don’t just randomly fix things: Create a priority list that hits the High-Risk settings that will give you the most security for your effort. Your plan should be a logical sequence of high-impact fixes, not a disorganized to-do list.
This plan should roll out in phases:
- Phase 1: High-Risk Credential Fixes (Setting up MFA, using strong password policies, and restricting Admin logins by IP). These are your first line of defense.
- Phase 2: High-Risk Access Fixes (Taking away “Modify All Data” permissions and tightening your Organization-Wide Defaults, or OWDs). If someone does manage to get inside, these fixes limit the amount of damage they can cause.
- Phase 3: Integration and Exposure Fixes (Reviewing Connected Apps and making sure Field Level Security, or FLS, is tight on sensitive fields). This is about closing all the backdoors and leaks.
This step-by-step approach guarantees you tackle the vulnerabilities that could cause the most catastrophic damage first. You’ll see the fastest, most measurable security improvement this way.
When (and when not) to use the button
The Health Check offers a “Fix Risks” button next to many settings, which instantly snaps your configuration into line with the Salesforce Security Baseline. It’s incredibly tempting, but use it with extreme caution.
- Go ahead and use it for: Simple, non-disruptive settings like enabling Clickjack protection or confirming all login pages use HTTPS. These are technical changes that almost never mess up a user’s workflow.
- NEVER use it for: Anything that touches access control (profiles, permissions, OWD), password policies, or session timeouts. Why? Because instantly changing these things can lock users out immediately, break your most important integrations, or cause a huge operational headache. Any change to a key access control setting must be tested in a Sandbox first—which brings us to the next step.
The Sandbox Test: Don’t Break Production
Better security is fantastic, but if your new security settings prevent your sales team from closing deals or shut down a critical data pipeline, you’ve just swapped one disaster for another. You have to test your security changes.
- Before you save a single change: Use a Full Sandbox to test every security update. A Full Sandbox is an exact, time-stamped copy of your live Production environment, with all your data and metadata. This is the only safe place to test a major security overhaul. Before you implement any fix from the Salesforce Org Health Check—especially changes to passwords, permissions, or session settings—apply that fix in your Full Sandbox. This ensures your testing is realistic.
- Preventing Outages: You must confirm that tightening security doesn’t accidentally disable mission-critical integrations. Your testing needs to focus on the biggest common point of failure: integrations. For example, reducing the permissions for an API-only user connected to your ERP system could stop it from syncing records. Or, shortening a session timeout might break a long-running batch job run by a privileged user. You need to conduct User Acceptance Testing (UAT) with key people from different departments to confirm that the tightened security doesn’t accidentally ruin essential workflows or integrations. Only after a clean run in the Full Sandbox should you schedule the change for deployment to Production.
Proving Your Compliance: Documentation for Auditors
Security isn’t just about being secure; it’s about proving that you are. In today’s heavily regulated world, your security configuration is constantly under the microscope for internal reviews and external audits (like GDPR, HIPAA, and SOX). Documentation turns your hard work into verifiable proof.
- Creating a Paper Trail: You need to export and archive key information from the Salesforce Org Health Check tool for internal and external audits. Once you’ve implemented your security fixes and achieved an acceptable Health Check score, you absolutely must export and archive the report. This “snapshot” proves your security status at that moment.
Your complete audit file should include three key documents:
- The Baseline Report: Your initial, low-scoring Salesforce Org Health Check report (showing your starting point).
- The Remediation Plan: The prioritized list you made in Step 7, detailing what you changed and why.
- The Final Report: The high-scoring Salesforce Org Health Check report (showing your secure end state).
This paper trail is irrefutable evidence of a robust, proactive security improvement process, which is often what auditors care about even more than a perfect score. You also need to keep a clear log of all changes deployed to Production, noting the date, the specific security setting adjusted, and the authorizing manager.
Speaking the Auditor’s Language
Auditors often don’t understand the details of Salesforce, but they certainly understand compliance standards. You need to connect your Salesforce Org Health Check results to their language:
- GDPR (General Data Protection Regulation): Your restrictive OWD settings and granular FLS on personal data directly support the principles of data minimization and privacy by design. Enforcing strong password policies and MFA proves you’re securely processing personal data.
- HIPAA (Health Insurance Portability and Accountability Act): Strict IP restrictions and mandatory FLS on Protected Health Information (PHI) are essential controls. Furthermore, the audit trail from tracking user logins and access is key for meeting HIPAA’s audit requirements.
- SOX (Sarbanes-Oxley Act): The aggressive application of the Principle of Least Privilege, specifically removing widespread “Modify All Data” and “View All Data,” is direct proof of proper segregation of duties, a cornerstone of financial reporting compliance.
The Non-Stop Job: Making Security a Habit
Security is not a destination; it’s a constant posture. Your organization’s needs change, your integrations evolve, and critically, the threats faced by every platform change daily. Treating security as a “one-and-done” project is the fastest way to return to a vulnerable state.
- Schedule it: Putting the Salesforce Org Health Check on your admin calendar—it’s not a one-time project. You must formalize the security review process. Add a recurring, non-negotiable monthly or quarterly appointment to your administrative calendar dedicated solely to running and reviewing the Health Check. Even if your score is 100%, changes elsewhere in your system, new user profiles, or updated Salesforce security baseline standards can drop your score overnight. Regularly checking the score minimizes “security drift” and keeps your organization agile in responding to new threats. This regular cadence shifts security from a chaotic reaction to a proactive routine.
- Leveling up your monitoring: Introduction to advanced surveillance tools like Event Monitoring and the Security Center. Once the baseline Salesforce Org Health Check is consistently green, you can level up your security surveillance.
- Event Monitoring: This is the ultimate surveillance tool, providing a highly detailed, granular log of almost every user action—who logged in, what reports they ran, which list views they accessed, and crucially, who exported data. By analyzing these logs, you can spot anomalous behavior, such as a user suddenly logging in from a strange city or exporting 10,000 records, which could indicate a malicious actor or a rogue insider.
- Security Center: For organizations with multiple Salesforce instances, the Security Center provides an aggregated, centralized dashboard. It lets you monitor security metrics and configuration across all your Salesforce environments simultaneously, ensuring consistency and flagging the riskiest orgs for immediate attention. This transforms security management from a siloed task into a unified, enterprise-wide strategy.
- Event Monitoring: This is the ultimate surveillance tool, providing a highly detailed, granular log of almost every user action—who logged in, what reports they ran, which list views they accessed, and crucially, who exported data. By analyzing these logs, you can spot anomalous behavior, such as a user suddenly logging in from a strange city or exporting 10,000 records, which could indicate a malicious actor or a rogue insider.

By embracing the Salesforce Org Health Check as the centerpiece of your security roadmap, you are moving beyond simple checklist compliance. You are adopting a proactive, verifiable, and sustainable security posture. This 10-step guide is your blueprint for turning a potential liability into a definitive competitive advantage—a guarantee that your data is not just valuable, but safely guarded.
To truly safeguard your Salesforce org, a strong Salesforce Org Health Check is just the beginning. Implementing the right configurations, strengthening your architecture, and ensuring airtight Salesforce development services require expertise you can trust. At AlmaMate Info Tech, we bring that expertise to every project. As a leading provider of Salesforce Development Services, we help businesses build secure, scalable, and compliant Salesforce environments—whether it’s optimizing security settings, enhancing custom development, or reinforcing org governance. If you’re serious about securing your org and elevating its performance, partner with AlmaMate Info Tech, the best salesforce development company, and take the next step towards a safer, smarter Salesforce ecosystem.