Table of Contents
Introduction to Flow in Salesforce
This is your practical guide for moving off old Salesforce automation—Workflow Rules (WFRs) and Process Builder (PB)—and adopting Salesforce Flow. We’re doing this the engineering way.
The goal? To build a system that’s predictable, stable, and easy to maintain. We’re focused purely on technical best practices, not marketing hype.
Inside this playbook, you’ll find battle-tested design patterns, crucial checklists, and Flow blueprints you can deploy straight to production.
Scope and Ground Rules
- Editions: We support Enterprise, Unlimited, or Developer editions. Flow Orchestration is optional.
- Clouds in Scope: Our focus is Sales Cloud and Service Cloud.
- Out of Scope: We’re generally not covering Marketing Cloud, Commerce Cloud, or Nonprofit Cloud, unless we say otherwise.
Data Assumptions
Who This Is For
- Data Model: We assume a standard Account–Contact structure. We’re assuming no funky managed packages are installed that mess with the native Order of Execution (OOE).
- Data Volumes: Design for typical transactions of 1–200 records. If you’re handling massive volumes, you need to rely on batch processing or dedicated Platform Event subscribers.
Non-Negotiable Governor Limits
To keep your org healthy, your new Salesforce Flows must hit these targets:
- DML Operations (Synchronous): ≤2 (save operations)
- SOQL Queries: ≤5 (database reads)
- Callouts (Synchronous): 0 (no real-time external system calls)
- CPU Time: Aim for a median of <100 milliseconds in sandbox tests.
Security and Rollback
- Security: Salesforce Flows must respect Field-Level Security (FLS) and sharing rules. Don’t use elevated permissions unless the requirement is crystal clear.
- Rollback Policy: Leave the legacy Workflow Rules / Process Builder components disabled but intact for one release window. This gives us a panic button for a rapid rollback if something breaks.
TL;DR (For the Busy Architect)
Object Topology
- Simplicity Wins: Use exactly one Before-Save (BS) and one After-Save (AS) Record-Triggered Flow per object.
- Naming Convention: Be explicit. Include the version and execution order. Example: Account__BS_v3 (01), Account__AS_v5 (01).
Efficient Execution
- Entry Conditions: Select “Only when updated to meet the condition.” Crucially, always compare the current record ($Record) to the old record ($Record__Prior) to avoid running the Flow unnecessarily.
- Performance Targets: Stick to the $ \le 2$ DML, $ \le 5$ SOQL, 0 callout, and <100 ms CPU limits.
- Speed Tip: All same-record updates must go into the Before-Save flow.
Bulk Safety and Async Work
- Bulk Safety: Always use collections (lists) and fire a single DML statement for each operation type. Never, ever perform DML inside a loop.
- Async Boundary: Handle external integrations and callouts asynchronously. Use the After-Save → Async Path, a Platform Event, or call Invocable Apex that runs as a Queueable job.
Observability and Control
- Error Logging: Every node that performs DML or an action must have a Fault Connector. This path leads to a standard LogError Subflow that logs the error to a custom object (Error_Log__c) and publishes a Platform Event (Error_Event__e).
- Feature Flags: Store business rules and toggles in Custom Metadata. This lets you change behavior per org without modifying and redeploying the Flow.
Testing and Cutover
- Testing: Minimum 2 Flow Tests per flow (the successful “happy” path + the “sad”/error path) and 1 bulk test (on ≥50 records). Always verify DML/SOQL counts and branch coverage.
- Cutover Plan: Run new Salesforce Flows in shadow mode in a sandbox → enable feature flags → disable Workflow Rules / Process Builder → monitor for 48–72 hours → delete the legacy components.
Architectural Grounding
1.1 The Order of Execution (OOE) with Record-Triggered Flows
Understanding when your logic runs is everything:
- Before-Save Flow: Runs before the database commit. It’s the fastest option and is ideal for updating the record that fired the Flow.
- After-Save Flow: Runs after the record has been committed to the database. This is your place for cross-object DML, external callouts (via Async Path), and orchestration.
Design Principle: Enforce a deterministic design—limit yourself to one Before-Save and one After-Save per object, and keep the logic modular using Subflows.
1.2 Why Workflow Rules & Process Builder Are Technical Debt
Old tools fail at scale for three reasons:
- Unpredictable Execution: Logic is spread across multiple Workflow Rules, Process Builder, and triggers, leading to an inconsistent and often broken execution order.
- Governor Limit Risk: Duplicated criteria and repeated DML in Process Builder nodes are a classic cause of TOO_MANY_SOQL/DML or UNABLE_TO_LOCK_ROW errors.
- Untestable Logic: It’s impossible to isolate logic, there’s no clear error path, and you get minimal coverage in unit tests.
1.3 Target Flow Topology (Example: Account)
This is how you structure clean, modular automation:
| Flow Type | API Name | Purpose | Modular Breakdown |
| Before-Save | Account__BS (01) | Fast updates to the current Account. | → Subflow: NormalizeName → Subflow: DeriveSLA |
| After-Save | Account__AS (01) | Cross-object logic and async tasks. | → Decision: ChangedToCustomer? → Subflow: ProvisionCustomerData → Async Path: → Subflow: SendWelcomeEvent → Subflow: CascadeToContacts |
1.4 Proving Determinism (Documentation)
For every object, you must document the following to prove your automation’s order and stability:
- Flow API Names/Versions: Account__BS_v3, Account__AS_v5.
- Trigger Explorer Order: Confirm the 01 execution order for both BS/AS, and state the technical rationale.
- Changed-Field Decisions: Clearly label the logic for triggering updates (e.g., ChangedToCustomer?, CriticalFieldsChanged?).
- Entry Conditions: Record the exact formulas, like ISCHANGED(StageName) or OR(ISCHANGED(Type), ISCHANGED(SLA__c)).
- Legacy Sign-off: Confirm and document that zero active Workflow Rules/Process Builder components remain on that object.
Migration Strategy
2.1 Overview
A successful migration isn’t just about swapping tools; it’s about building a solid foundation.
Stick to these rules:
- Crawl, Walk, Run: Start with a small object, prove your process works and is repeatable, then scale it across the org.
- Data First: Don’t guess what the old automation does. Get the hard data on existing logic before you design anything new.
- Easy Rollback: Never delete the legacy automation right away. Just deactivate it.
2.2 The Phased Approach
Phase 1: Inventory and Mapping
This is your due diligence phase—figure out what you have.
- Scrape the Org: Get a list of every active WFR and PB for each object. Use the Setup Tree or a metadata API tool for this.
- Document Everything: For each automation, record:
- The Criteria Logic (when does it run?).
- All Actions (Field Update, Email, Task, etc.).
- Its current Execution Order and how it re-evaluates rules.
- Map the Target: Decide where the logic belongs in the new world:
- Same-record field updates → Before-Save Flow (Fastest performance)
- Cross-object DML, callouts, or async work → After-Save Flow
- Clear the Clutter: Identify and flag any redundant or conflicting logic now.
Phase 2: Design
Set the structure. This is where you enforce discipline.
- Define the Pair: Create one Flow pair per object: one Before-Save (__BS) and one After-Save (__AS).
- Modularize: Break down complex business logic into reusable Subflows.
- Decouple: Use Custom Metadata Types (CMDTs) for feature flags and conditional rules. This lets you change the behavior without editing the Flow itself.
- Document: Define the expected inputs, outputs, and the specific error paths for every new Flow.
Phase 3: Build and Validate
Put the code down and prove it works.
- Build in Isolation: Create the new Salesforce Flows in a developer sandbox.
- Prove Parity: Use Flow Tests and Apex tests to confirm the new Salesforce Flows deliver the exact same results as the old ones.
- Benchmark Limits: Use Debug Logs and Flow Interviews to confirm governor usage. Your DML and SOQL statements must stay within the targets.
Phase 4: Cutover
The actual flip of the switch.
- Shadow Mode: Deploy the new Salesforce Flows to UAT or Full Sandbox, but keep their business logic disabled using your metadata flags.
- Compare Results: Run transactions and compare the output from the old WFR/PB against the disabled Flow runs.
- The Switch: Once validated, deactivate the legacy WFR/PB components and enable the Flow feature flags.
- Monitor: Watch the system like a hawk for 48–72 hours, scrutinizing logs for any anomalies.
Phase 5: Post-Migration Hardening
Clean up and secure the new automation.
- Refine: Delete unused variables, debug elements, and any obsolete Subflows.
- Standardize: Integrate the final Error Handling Subflows and structured logging components (Error_Log__c, Error_Event__e).
- Test Depth: Push test coverage to >85% branch coverage.
- Archive: Take metadata snapshots for version history and proof of compliance.
2.3 Success Metrics
| Metric | Target | Validation Method |
| CPU Time | <100 ms | Debug Log Analysis |
| SOQL Queries | ≤5 | Log Parser/Governor Report |
| DML Operations | ≤2 | Governor Report Analysis |
| Error Rate | 0 | Error_Log__c Monitoring |
| Rollback Time | <1 hour | Documented Process for Process Builders (Disable Flows, Re-enable Old Logic) |
2.4 Rollback Plan
If something breaks in production, execute this plan immediately:
- Deactivate the new Salesforce Flows (both BS and AS).
- Reactivate the original Workflow Rules and Process Builder.
- Revert any Feature Flags that were enabled.
- Rerun regression tests to confirm stability.
- Document the root cause and remediation steps before trying again.
Design Patterns and Implementation Rules
3.1 Core Principles
A migration isn’t just translation; it’s a chance to build deterministic, modular, and testable automation from the ground up.
- Determinism Over Convenience: Predictable execution order is more important than saving a few clicks in the designer.
- Separation of Concerns: Each Flow should focus on one job (e.g., validation, data enrichment, or external orchestration).
- Bulk Safety First: Every single element must handle collections of records gracefully.
- Fail Loud, Not Silent: All errors must be logged consistently using your standardized error-logging pattern.
- Metadata-Driven Logic: Use Custom Metadata to manage conditions, feature flags, and mapping tables.
3.2 Flow Topologies
3.2.1 Before-Save (BS) Flow
Purpose: Update fields on the same record with maximum efficiency, running before the database commit.
Usage Rules:
- No DML or callouts. You cannot save or call external systems.
- Use Assignment elements for same-record updates.
- Keep it small; ideally, ≤5 elements.
- Always use $Record__Prior comparisons to ensure the Flow only runs when meaningful data has actually changed.
Typical Pattern: Start → Decision (HasCriticalChange?) → Subflow: DeriveValues → Assignment (Set Fields)
3.2.2 After-Save (AS) Flow
Purpose: Execute logic that requires the record ID and fields to be saved first.
Usage Rules:
- This is the safe place for cross-object DML and asynchronous logic.
- Use the Async Path for external calls and heavy, time-consuming logic.
- Every After-Save Flow must end with a clean fault path → LogError Subflow.
Typical Pattern: Start → Decision: ChangedToCustomer? → Subflow: ProvisionCustomerData → Async Path: SendWelcomeEvent → Subflow: UpdateContacts
3.2.3 Subflows
Purpose: Promote reusability and isolate complex business rules.
Rules:
- Subflows must not perform DML or SOQL unless their purpose is strictly limited to that (and clearly documented).
- Name them using a functional prefix, e.g., SF_NormalizeName, SF_LogError.
- Document their inputs and outputs clearly in the Flow description.
3.3 Governor-Safe Design
Hit your performance targets with these rules:
| Area | Rule | Tip |
| DML | ≤2 per transaction | Collect records in a list and perform one bulk DML operation at the end. |
| SOQL | ≤5 queries | Use Get Records with tight, filtered criteria; never put a Get Records inside a loop. |
| CPU Time | <100 ms median | Use simple Assignment elements over formula recalculation whenever possible. |
| Async Work | Move to Async Path | This is the ideal spot for callouts, long loops, and external integration events. |
3.4 Error Handling Pattern
3.4.1 Standard Fault Path
Any Flow element that saves data (DML), reads data (SOQL), or calls Apex must connect to a Fault Connector.
This connector always leads to a shared Subflow named SF_LogError.
Example: [Update Records] → (Fault) → [SF_LogError]
SF_LogError should:
- Capture the Flow name, the specific element that failed, the error message, and the User ID.
- Write an entry to Error_Log__c and publish an Error_Event__e Platform Event.
- Optionally notify an admin via email or Slack.
3.4.2 Resilience Testing
Before deployment, you must test the Flow’s reaction to failure:
- Validation rule errors
- Record lock failures (UNABLE_TO_LOCK_ROW)
- Null reference exceptions
- Apex errors from Invocable actions
Run each scenario via a Flow Test and confirm that Error_Log__c entries are created correctly.
3.5 Feature Flags and Custom Metadata (CMDT)
Use CMDTs to store configuration and externally control logic execution.
Example CMDT: Automation_Control__mdt
| Field | Type | Purpose |
| Object_API_Name__c | Text | The object the rule applies to (e.g., Account) |
| Flow_Name__c | Text | The specific Flow or Subflow reference |
| Is_Enabled__c | Checkbox | The toggle to enable/disable the path |
| Execution_Order__c | Number | Defines the desired run order |
In your Flow, you’d use a Get Records element to look up this CMDT: Automation_Control__mdt WHERE Object_API_Name__c = “Account” AND Is_Enabled__c = TRUE
You can then use the result to decide whether a Flow path runs dynamically.
3.6 Flow Versioning and Naming Convention
Use a disciplined naming system to manage your single-Flow pair:
| Object | Type | Version | Example Name |
| Account | Before-Save | v3 | Account__BS_v3 (01) |
| Account | After-Save | v5 | Account__AS_v5 (01) |
| Contact | After-Save | v2 | Contact__AS_v2 (01) |
- Use the numerical suffix (01), (02) to specify the deterministic execution order within the Trigger Explorer.
- Document the version rationale (author, date, summary of changes) in the Flow description field.
3.7 Subflow Composition Rules
- Call by API Name: Always reference Subflows by their API name, not their display label, to prevent issues with language translations.
- Tight Scope: Only pass the variables required; don’t unnecessarily expose large data structures.
- Collection Inputs: Mark all collection variables as “Available for Input” if they are meant to be passed from the parent Flow.
- Avoid Globals: Don’t rely on global variables like $RecordType unless it’s strictly necessary.
3.8 Testing and Validation Framework
3.8.1 Flow Tests
Every Flow needs a baseline test set:
- A happy-path test—confirm the logic runs error-free.
- A sad-path test—confirm the logic fails gracefully and SF_LogError triggers correctly.
- A bulk test—run ≥50 records to confirm governor safety under load.
3.8.2 Apex Support Tests
If your Flow calls any Invocable Apex actions, you must write complementary Apex test methods to simulate the Flow inputs and verify the Apex logic’s output.
The Salesforce Execution Lineup/Order of Execution (OOE)
4.1 The Updated Play-by-Play
When you create or update a record, Salesforce runs through these steps:
- Before Triggers and Before-Save Flows (Your first chance to run logic, and the fastest!)
- Validation Rules
- Duplicate Rules (If they’re switched on)
- The Record Commit (Salesforce actually saves the data to the database)
- After Triggers and After-Save Salesforce Flows (Your first chance to see the new record ID and save related records)
- Assignment Rules (Think Lead or Case assignment)
- Auto-Response Rules
- Workflow Rules (The legacy spot)
- Process Builder (Also legacy)
- Escalation Rules
- Entitlement Rules
- Roll-Up Summary Recalculation
- Email Notifications
The Goal: We want to minimize our reliance on those slow, downstream legacy steps (8 and 9). Your logic needs to execute fast and predictably at Step 1 (Before-Save) or Step 5 (After-Save).
4.2 Before-Save vs. After-Save: The Right Place for the Job
This is the most crucial decision you’ll make when designing a Flow.
| Flow Type | When It Runs | What It’s For | Speed | Can I Save (DML)? |
| Before-Save | Before the record hits the database. | Updating fields on the same record. | Fastest (can be 10x faster than PB!) | No |
| After-Save | After the record hits the database. | Creating/updating other records, API calls, or async work. | Slightly slower, but necessary. | Yes |
In Plain English:
- Need to clean up a phone number or calculate a discount field? → Use Before-Save.
- Need to create a follow-up task or post data to an external ERP system? → Use After-Save (or its Async Path).
4.3 Placement by Object Type
For core objects, you usually need both Flow types to manage the full range of business requirements.
| Object | Flow Type | Context |
| Account | BS & AS | Core CRM logic; it frequently touches Contacts, Opps, and external systems. |
| Contact | BS & AS | Common for data cascading down to related records and sending customer emails. |
| Opportunity | BS & AS | Critical for calculating SLAs, revenue forecasting, and complex deal stages. |
| Case | BS & AS | Heavily tied to service automation, entitlements, and support processes. |
A Warning: Avoid creating automation on both a parent and a child object for the same event. If you need to update related data, separate that work using Platform Events or Async Paths to prevent locking and cascading failures.
4.4 Recommended Object Flow Map
This shows you what a clean, deterministic Flow structure looks like for standard Sales Cloud objects:
The result: Every object has one single, known point of entry for its automation logic.
| Object/Flow | Subflow Components | Purpose |
| Account__BS_v3 (01) | SF_NormalizeName, SF_DeriveSLA | Clean data and calculate values quickly. |
| Account__AS_v5 (01) | SF_UpdateContacts, Async Path → SF_Integrations, SF_LogError | Update related records and handle external systems. |
| Contact__BS_v2 (01) | SF_SetGreeting | Simple field assignment on the contact record. |
| Contact__AS_v2 (01) | SF_NotifyAccount, Async Path → SF_SendWelcomeEmail, SF_LogError | Notify parent and handle customer communications. |
4.5 Enforcing the Order: The Trigger Explorer
We use the Trigger Explorer tool to enforce the single-Flow design.
- You must assign numeric order values (like 01) to your Before-Save and After-Save Salesforce Flows.
- You need to visually verify that only one Flow is active per object per phase (BS/AS).
- Document the order numbers and the reason for that order in your design sheet.
| Object | Flow Name | Type | Order | Why? |
| Account | Account__BS_v3 | Before-Save | 01 | Base same-record logic |
| Account | Account__AS_v5 | After-Save | 01 | Post-commit orchestration |
| Contact | Contact__BS_v2 | Before-Save | 01 | Data normalization |
| Contact | Contact__AS_v2 | After-Save | 01 | Post-insert notification |
4.6 Placement Validation Checklist
Before you hit deploy, double-check this list for every object:
- Only one active Before-Save and one After-Save Flow.
- Salesforce Flows use the entry condition: “When updated to meet condition requirements.”
- No overlapping logic between your Salesforce Flows and any remaining Apex Triggers.
- Trigger Explorer order numbers are documented and make sense.
- $Record__Prior comparisons exist to prevent the Flow from running for meaningless field changes.
- All fault paths are connected to your single, standardized logging Subflow.
4.7 Special Cases
- Platform Events: Use your After-Save Flow (or Invocable Apex called from it) to publish events asynchronously. Keep the data payload small!
- Scheduled Flows: Reserve these for non-transactional tasks like weekly data cleanups or maintenance. Never use them to try and mimic real-time triggers.
- Flow Orchestration: This is great for multi-step processes that involve user interaction. Keep the orchestration logic separate from your foundational record-triggered automation.
Data Handling, Bulk Safety, and Performance
The performance of your Flow depends entirely on how you manage data. Always assume the system will process multiple records in a single transaction (that’s the definition of bulk processing).
Bulk-Safe Rules (The Must-Haves)
- Use Collections: Every Get Records and Update Records element must work with collection variables (lists).
- Aggregate DML: Never perform DML inside a loop. Collect the records first, then commit the entire batch in a single operation.
- Scope Variables: Keep your variables local and clear.
- Relationship Queries: For parent–child operations, use a single SOQL query with a relationship lookup to get all the data you need at once.
Performance Tips
- Store Values: If a formula field is heavy and rarely changes, calculate the value once and store it in a standard field to avoid constant recalculation.
- Limit Fields: In your Get Records, only retrieve the fields you actually need.
- Monitor Limits: Use debug logs to monitor CPU and heap. If limits consistently approach 50%, it’s time to refactor.
Asynchronous Processing and Integrations
After-Save Salesforce Flows are your gateway to the outside world. They hand off long-running, external work so they don’t block the user’s transaction.
- Async Path: This is your primary tool for API callouts, huge loops, and external system synchronizations.
- Queueable Apex: Still valid for complex integration payloads that require heavy coding or logic that Salesforce Flows can’t handle.
- Failure Catch: Always log async failures in Error_Log__c. You need a manual process (built using a Process Builder) to replay those failed events if necessary.
Pattern Example:
After-Save Flow → Decision: IsIntegrationEnabled? → Async Path → Subflow: PostToERP → LogError
This design isolates the integration work, so a slow API response doesn’t slow down the record commit.
Testing, Validation, and Deployment
Testing is Your Quality Guarantee
- Flow Tests: Use the built-in Flow Test tool to validate logic, variable assignments, and DML counts. Every Flow needs:
- Happy Path: The expected scenario runs perfectly.
- Sad Path: The logic fails and confirms your SF_LogError triggers.
- Bulk Test: Run ≥50 records to confirm governor safety.
- Apex Tests: If you call Apex, write Apex tests that mimic Flow inputs and verify the output.
- Test Load Generator: Use a consistent data creation pattern to ensure testing is repeatable across sandboxes.
Deployment Final Checks
- UAT Validation: Validate your Salesforce Flows in UAT with realistic data volumes.
- Gradual Enablement: Use feature flags to enable Salesforce Flows slowly, object by object.
- Capture Metrics: Record pre- and post-migration metrics: CPU Time, DML Count, and Error Rate.
Cutover and Rollback Playbook
- Shadow Mode: Deploy new Salesforce Flows but keep them deactivated. Turn on logging to compare results against WFR/PB.
- Parallel Run: Compare Flow output logs directly against legacy WFR/PB outputs.
- Activate: Enable feature flags gradually per object.
- Deactivate Legacy: Disable WFR/PB only after metrics stabilize.
- Rollback (If Needed):
- Deactivate the new Salesforce Flows.
- Reactivate the original automations.
- Reset feature flags.
- Log the reason and set a fix window.
Goal: Your average rollback time should be under one hour.
Observability and Error Management
You can’t fix what you can’t see. Reliable operations require constant visibility.
- Standardized Logging:
- Error_Log__c: Captures the Flow name, the specific element that failed, the user, and the stack trace.
- Error_Event__e: Publishes the exact same data for asynchronous monitoring systems.
- Dashboards: Expose key metrics:
- Error rate over time.
- Top failing Salesforce Flows.
- Mean time to recovery (MTTR).
- Notifications: Integrate Error_Event__e with Slack or email alerts. Admins must acknowledge an error within 30 minutes of publication.

Governance and Continuous Improvement
The migration is over, but governance never is.
Monthly Health Checks
- Clean Versions: Review inactive Flow versions and delete the old ones.
- Limit Validation: Confirm governor limits remain below the 80% threshold.
- CMDT First: Update your Custom Metadata for new business logic instead of modifying Salesforce Flows directly.
Release Discipline
- Source Control: Store all Salesforce Flows in a source-controlled repository.
- Quality Gate: Require code review and Flow Test evidence for every change.
- Versioning: Tag releases with semantic versioning (e.g., v5.1.0).
Training
Every admin must be able to interpret error logs, run tests, and read the Trigger Explorer order.
Appendix A: Sample Flow Blueprint
| Object | Flow | Notes |
| Opportunity | Opportunity__BS_v2 → Decision: StageChanged? → Subflow: DeriveProbability → Assignment: SetNextStep | All DML is aggregated; logic is clean and fast. |
| Opportunity | Opportunity__AS_v3 → Subflow: NotifyAccountTeam → Async Path → SF_PostToRevenueSystem → SF_LogError | External call handled asynchronously; error path is standard. |
Appendix B: Flow Migration Checklist
- Inventory all WFR/PB automations
- Design single BS + AS pair per object
- Implement feature-flag metadata
- Write Flow Tests (happy / sad / bulk)
- Verify CPU <100 ms, DML ≤2, SOQL ≤5
- Run shadow mode and parallel validation
- Deactivate legacy automations
- Capture and archive logs.
Mini-Lab — Shadow Run Validation
- In sandbox, activate both legacy PB and new Salesforce Flows.
- Insert 10 test records and compare field outcomes.
- Export Flow Interview logs; confirm parity.
- Trigger an intentional fault (e.g., validation rule violation).
- Review Error_Log__c entry and confirm message consistency.
Outcome: parity achieved, fault path verified, and rollback confirmed safe.
Provenance Pack
Every migration must include:
- Pre-migration metadata snapshot (WFR, PB XML)
- Post-migration Flow definitions
- Test evidence (Flow Test results and debug logs)
- Deployment timeline and rollback confirmation
Archive these in a shared repository for compliance traceability.
Style Guardrails
To keep this playbook maintainable:
- Write element labels in Sentence Case.
- Use short, descriptive names: Set SLA Value, Check Type Change.
- Prefix subflows with SF_.
- Add descriptions for all decisions and assignments.
- Document rationale for any exceptions to governor rules.
Conclusion
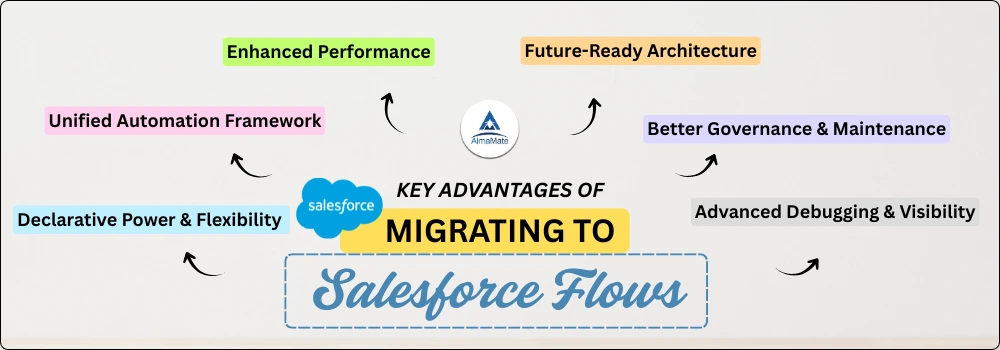
Migrating to Salesforce Flows is more than replacing old tools — it’s a modernization of your automation architecture.
By enforcing deterministic order, bulk safety, error visibility, and feature-flag control, organizations can achieve a resilient, testable automation framework that scales with every release.
Follow this playbook end-to-end, and your org will gain predictable behavior, reduced technical debt, and faster innovation cycles.
As Salesforce continues to evolve, adopting Flows isn’t just an upgrade—it’s a strategic move toward smarter, more sustainable automation. Transitioning from Workflow Rules and Process Builder to Salesforce Flows allows organizations to streamline operations, improve scalability, and enhance visibility across business processes.
At AlmaMate InfoTech, a trusted Salesforce development company, we specialize in designing custom Salesforce solutions that go beyond simple migration. Our team helps you reimagine automation with best practices, robust governance, and a forward-thinking architecture that supports future Salesforce releases.
Whether you’re modernizing legacy workflows, optimizing complex process logic, or planning a complete org transformation, we can help you do it seamlessly and intelligently. Let’s collaborate to build a future-ready Salesforce ecosystem—efficient, resilient, and tailored to your vision.

